









Registration and download
Before installing WordMagic CMS, you need to register your purchase. Sign in to your personal dashboard on the WordMagic CMS website at wmcms.eu. In the Activity/Purchases section, click the Show button in the Product column.
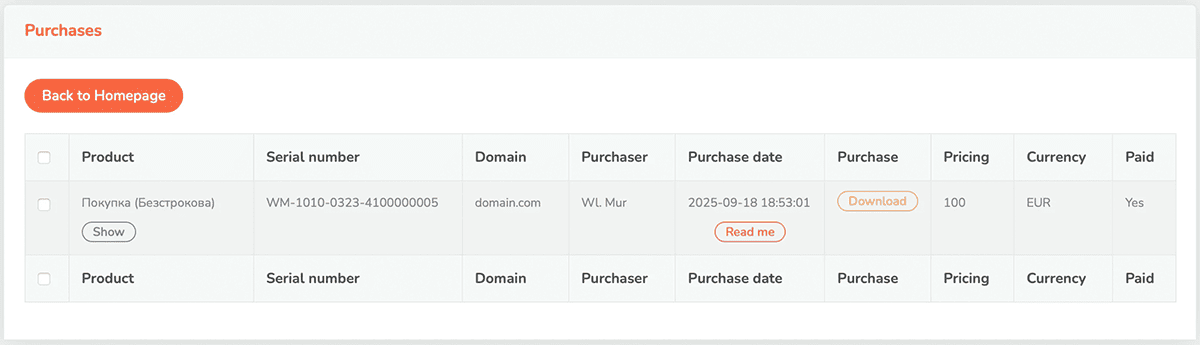
Fig. 1. List of purchases in the user dashboard.
In the form that opens, enter your domain name in the Domain field and click the Update button.
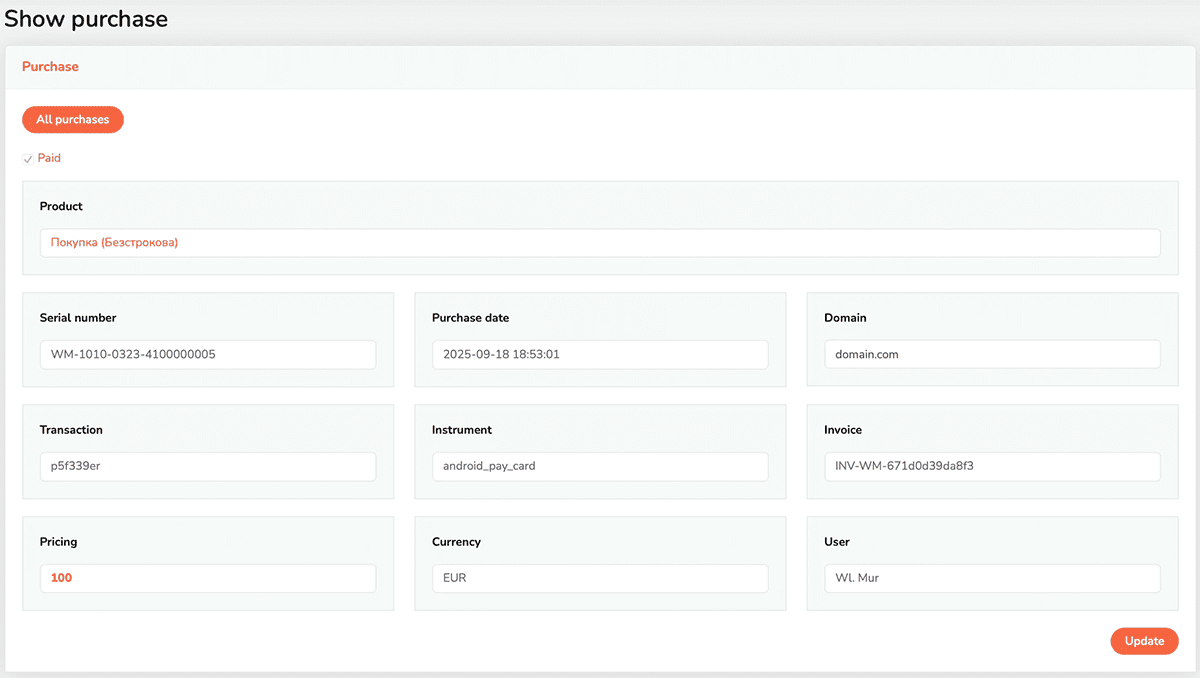
Fig. 2. Purchase registration form.
After saving the registration, you will be returned to the purchases table. The Download button will become active, indicating that the registration was successful and the purchase is ready to be downloaded. You will be notified when the archive with the latest version of your purchase is generated. This usually takes 10–15 seconds.
Move the downloaded archive to the website root folder on your hosting (for example: domain.com/) and extract it there.
After successful extraction, the archive file can be removed.
Website installation
Next, open the CMS installer in your browser: https://domain.com/install. You will see the WordMagic CMS installation form.
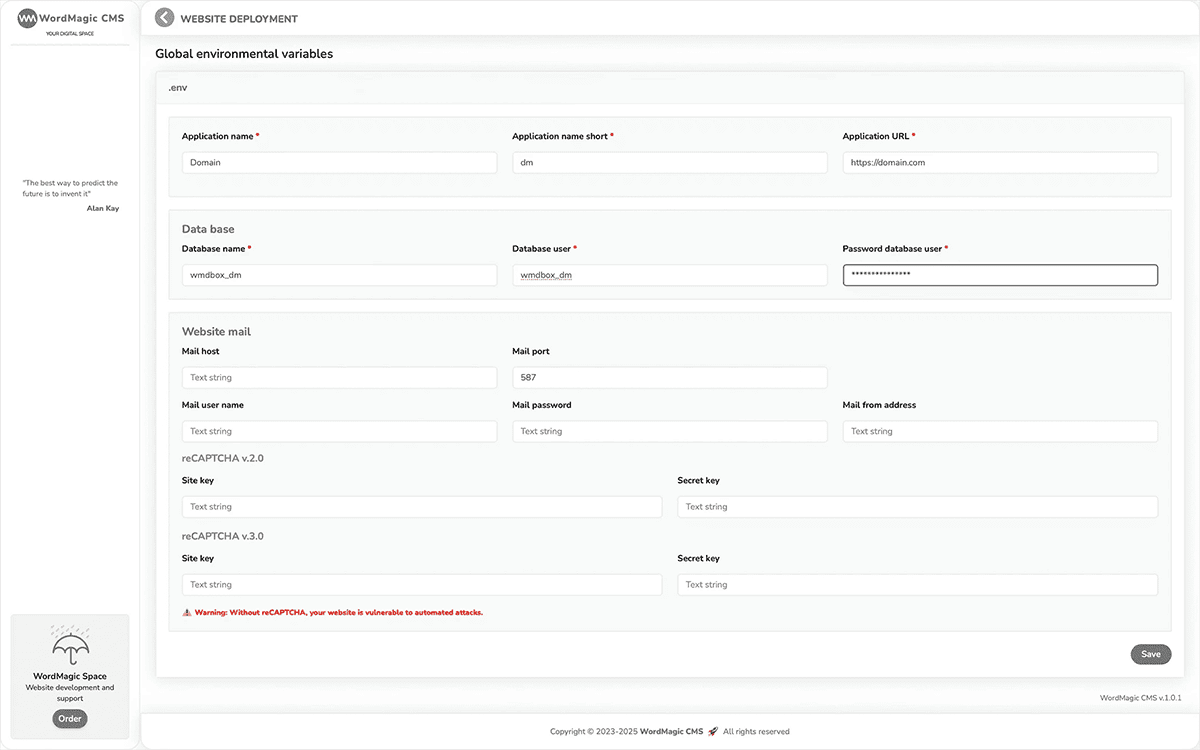
Fig. 3. WordMagic CMS installation form.
In this form, enter the website information:
- full website name;
- short website name;
- full website URL.
Also enter the database details and administrator credentials. These were prepared during the hosting setup stage:
- database name;
- database administrator username;
- database administrator password.
If you already have access details for your email account or Google reCAPTCHA keys, it is recommended to enter them during installation. If not, they can be added later in: Other settings/Mail and alarms in the website administration panel.
If all required fields (marked with a red asterisk) are filled in, click the Save button.
WordMagic CMS will then be installed, and the website will be fully ready for use. This is the next step from preparation to a working system - and another quiet touch of the magic of words.